Upcoming Classes
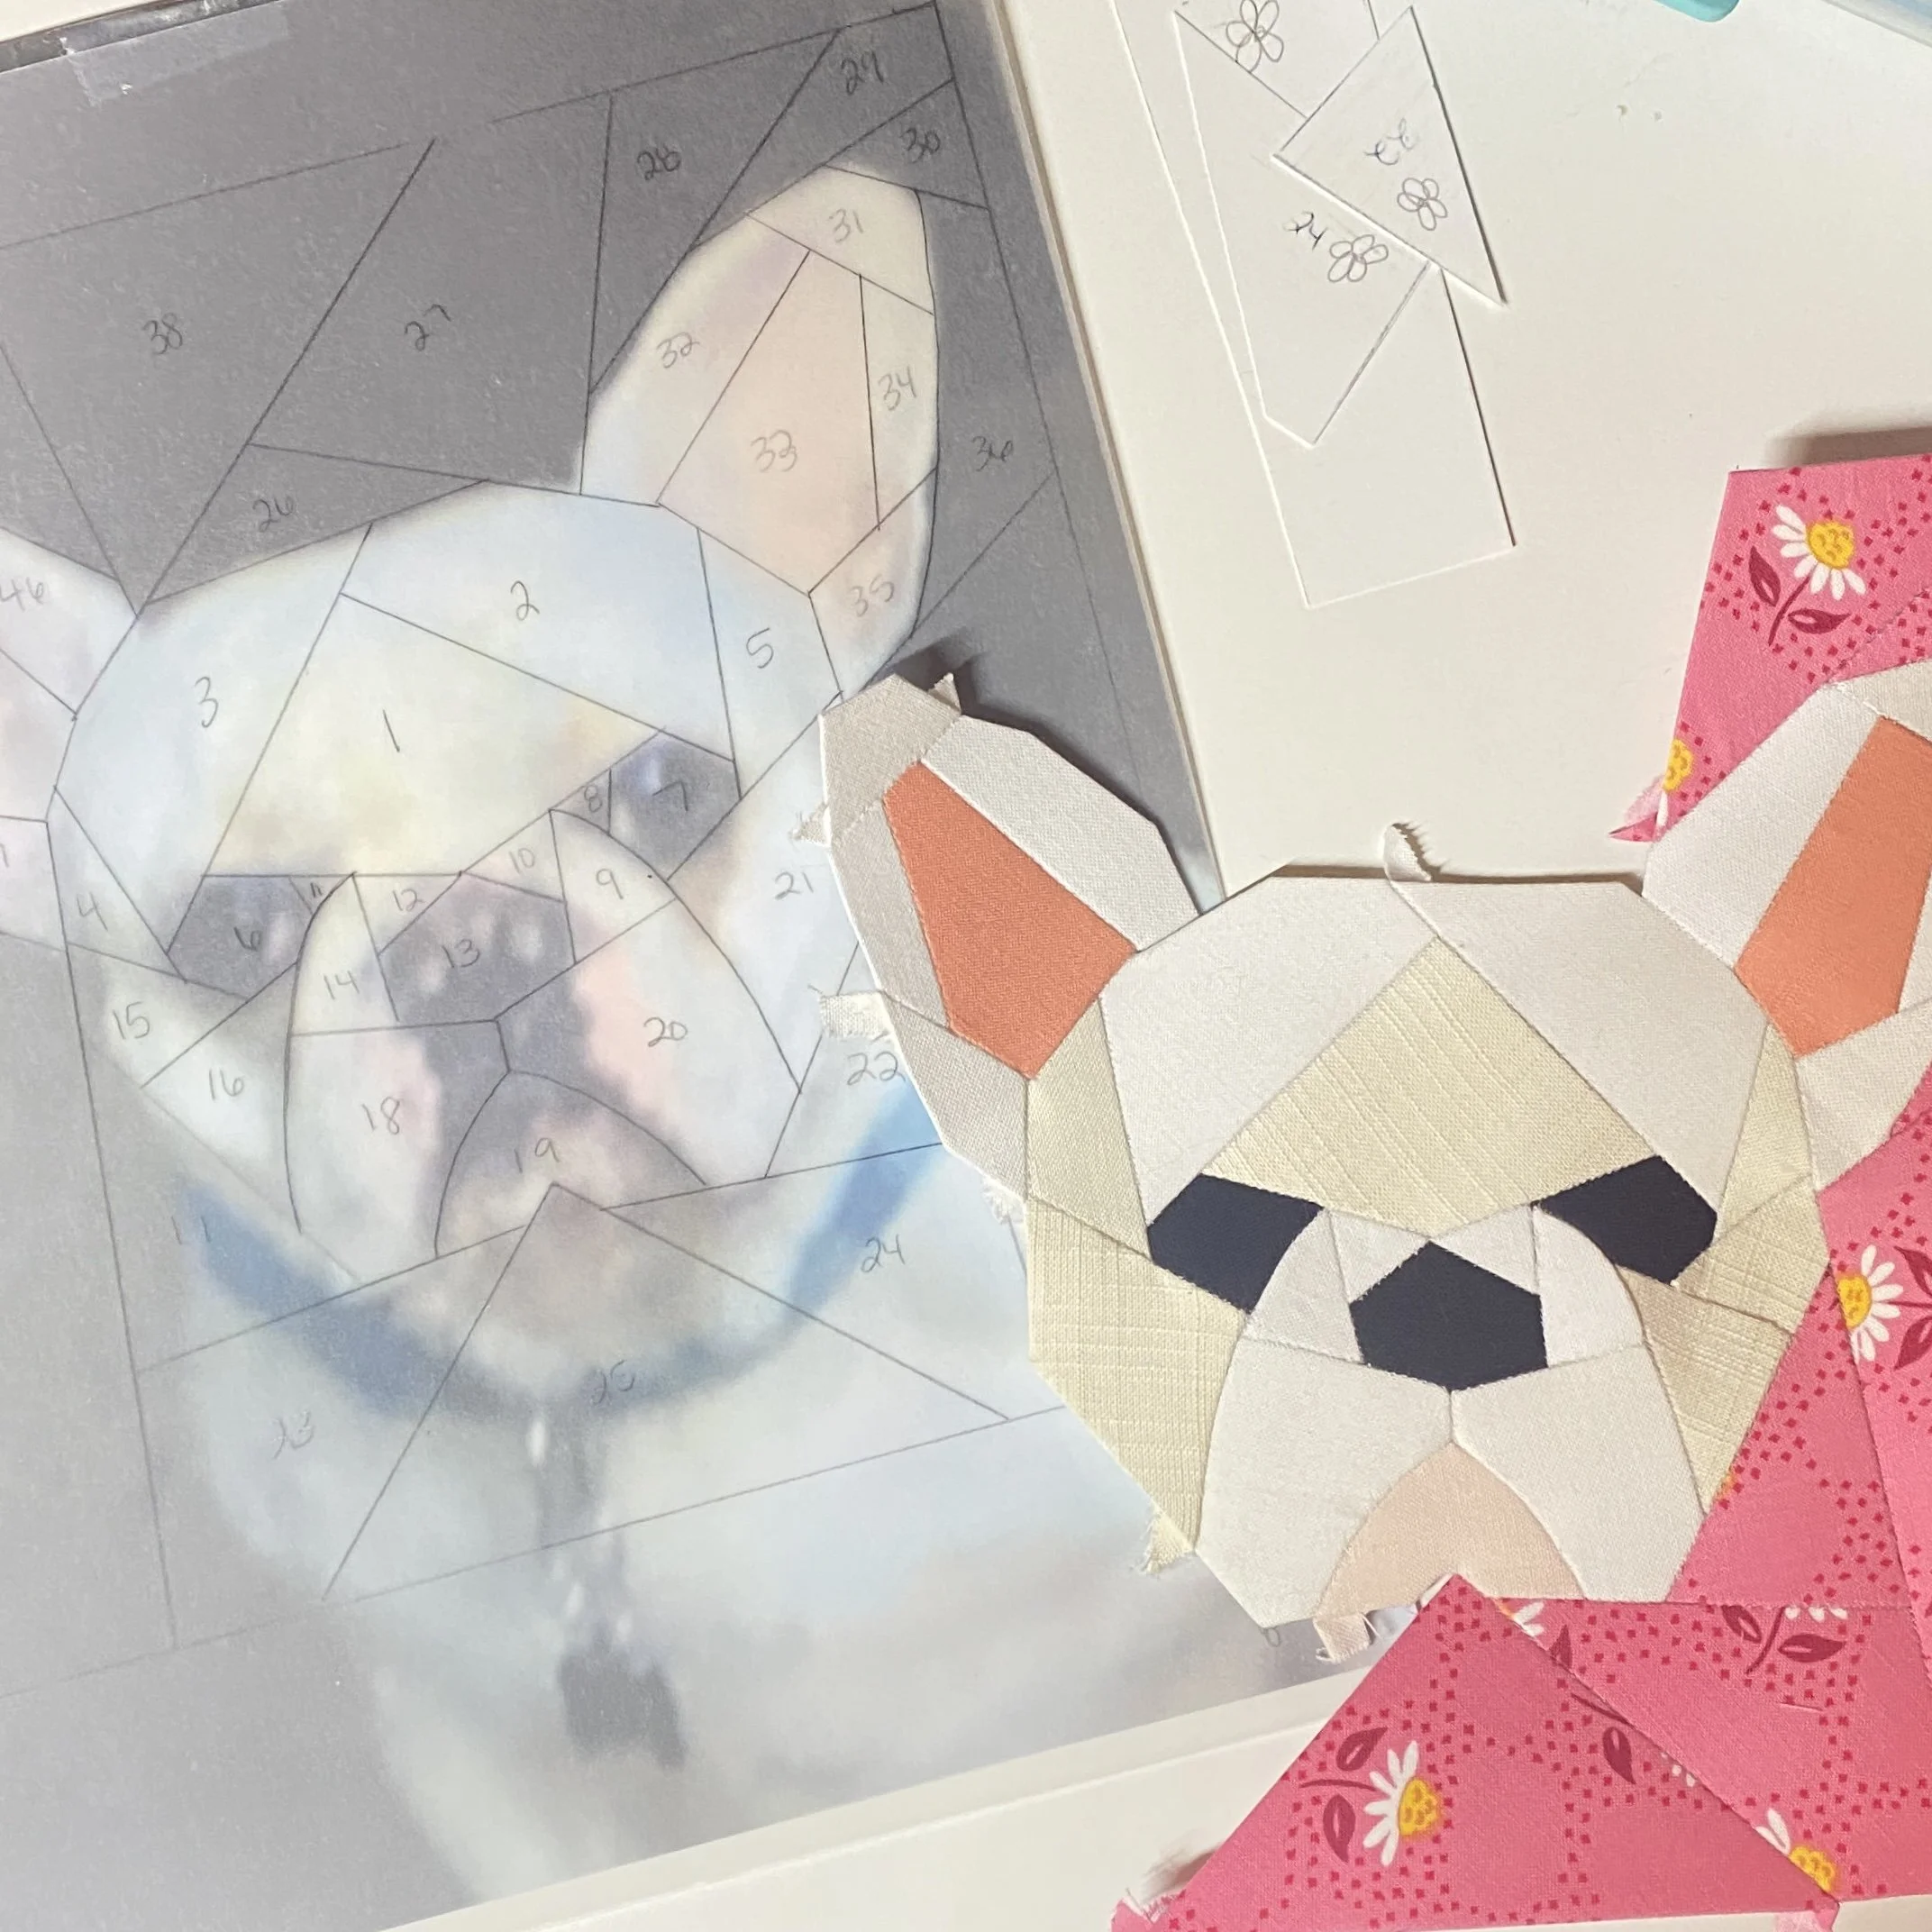
EPP Your Pet with Violet Craft
Sewtopia Spring: Milwaukie, WI (SOLD OUT)
April 18-21, 2024
So, you say you don't want to EPP a pet? That's quite alright, any object will do... A pineapple, persimmon, peach, peony, but no people please :) People are really difficult as a starting project.
In this design class each student will make a custom scalable block pattern from an image of their pet or another object intended for English paper piecing.
English paper piecing is a technique where fabric is wrapped around paper templates and secured with basting stitches or glue. I teach glue basting. Other techniques are discussed briefly and welcome to be used. The pieces are then sewn together by hand. Our time together will focus primarily on designing your pattern and will cover beginning EPP techniques.
Supply List
An enlarged photo or image of the pet or item you want to pattern. If possible bring one or more clear images printed at least 8.5" x 11". Your final pattern can be enlarged or reduced, but a larger starting image is easier to work with and pattern.
a pencil, eraser, straight edge and paper scissors
The $10 kit fee for this class includes overlay paper, dry erase marker, tracing paper, heavy EPP template paper, and all copies you will make in class on my personal copy machine. Pay ahead of time by purchasing HERE.
Optional EPP Notions
Fabric for your project - Consider your chosen people, place or thing to design and your own aesthetic. Bring a small selection of fabrics to begin the project. Most quilting textiles will work well together including but not limited to quilting weight cotton, linens, wovens, and blends. This is an excellent project to use scraps.
Meet Your Mountain with Violet Craft
Foundation Paper Piecing Construction + Deconstruction
This is my ONLY open teaching event in 2024. Sign up early to secure your space!
Madeline Island School of the Arts: Madeline Island, WI
June 10-14, 2024
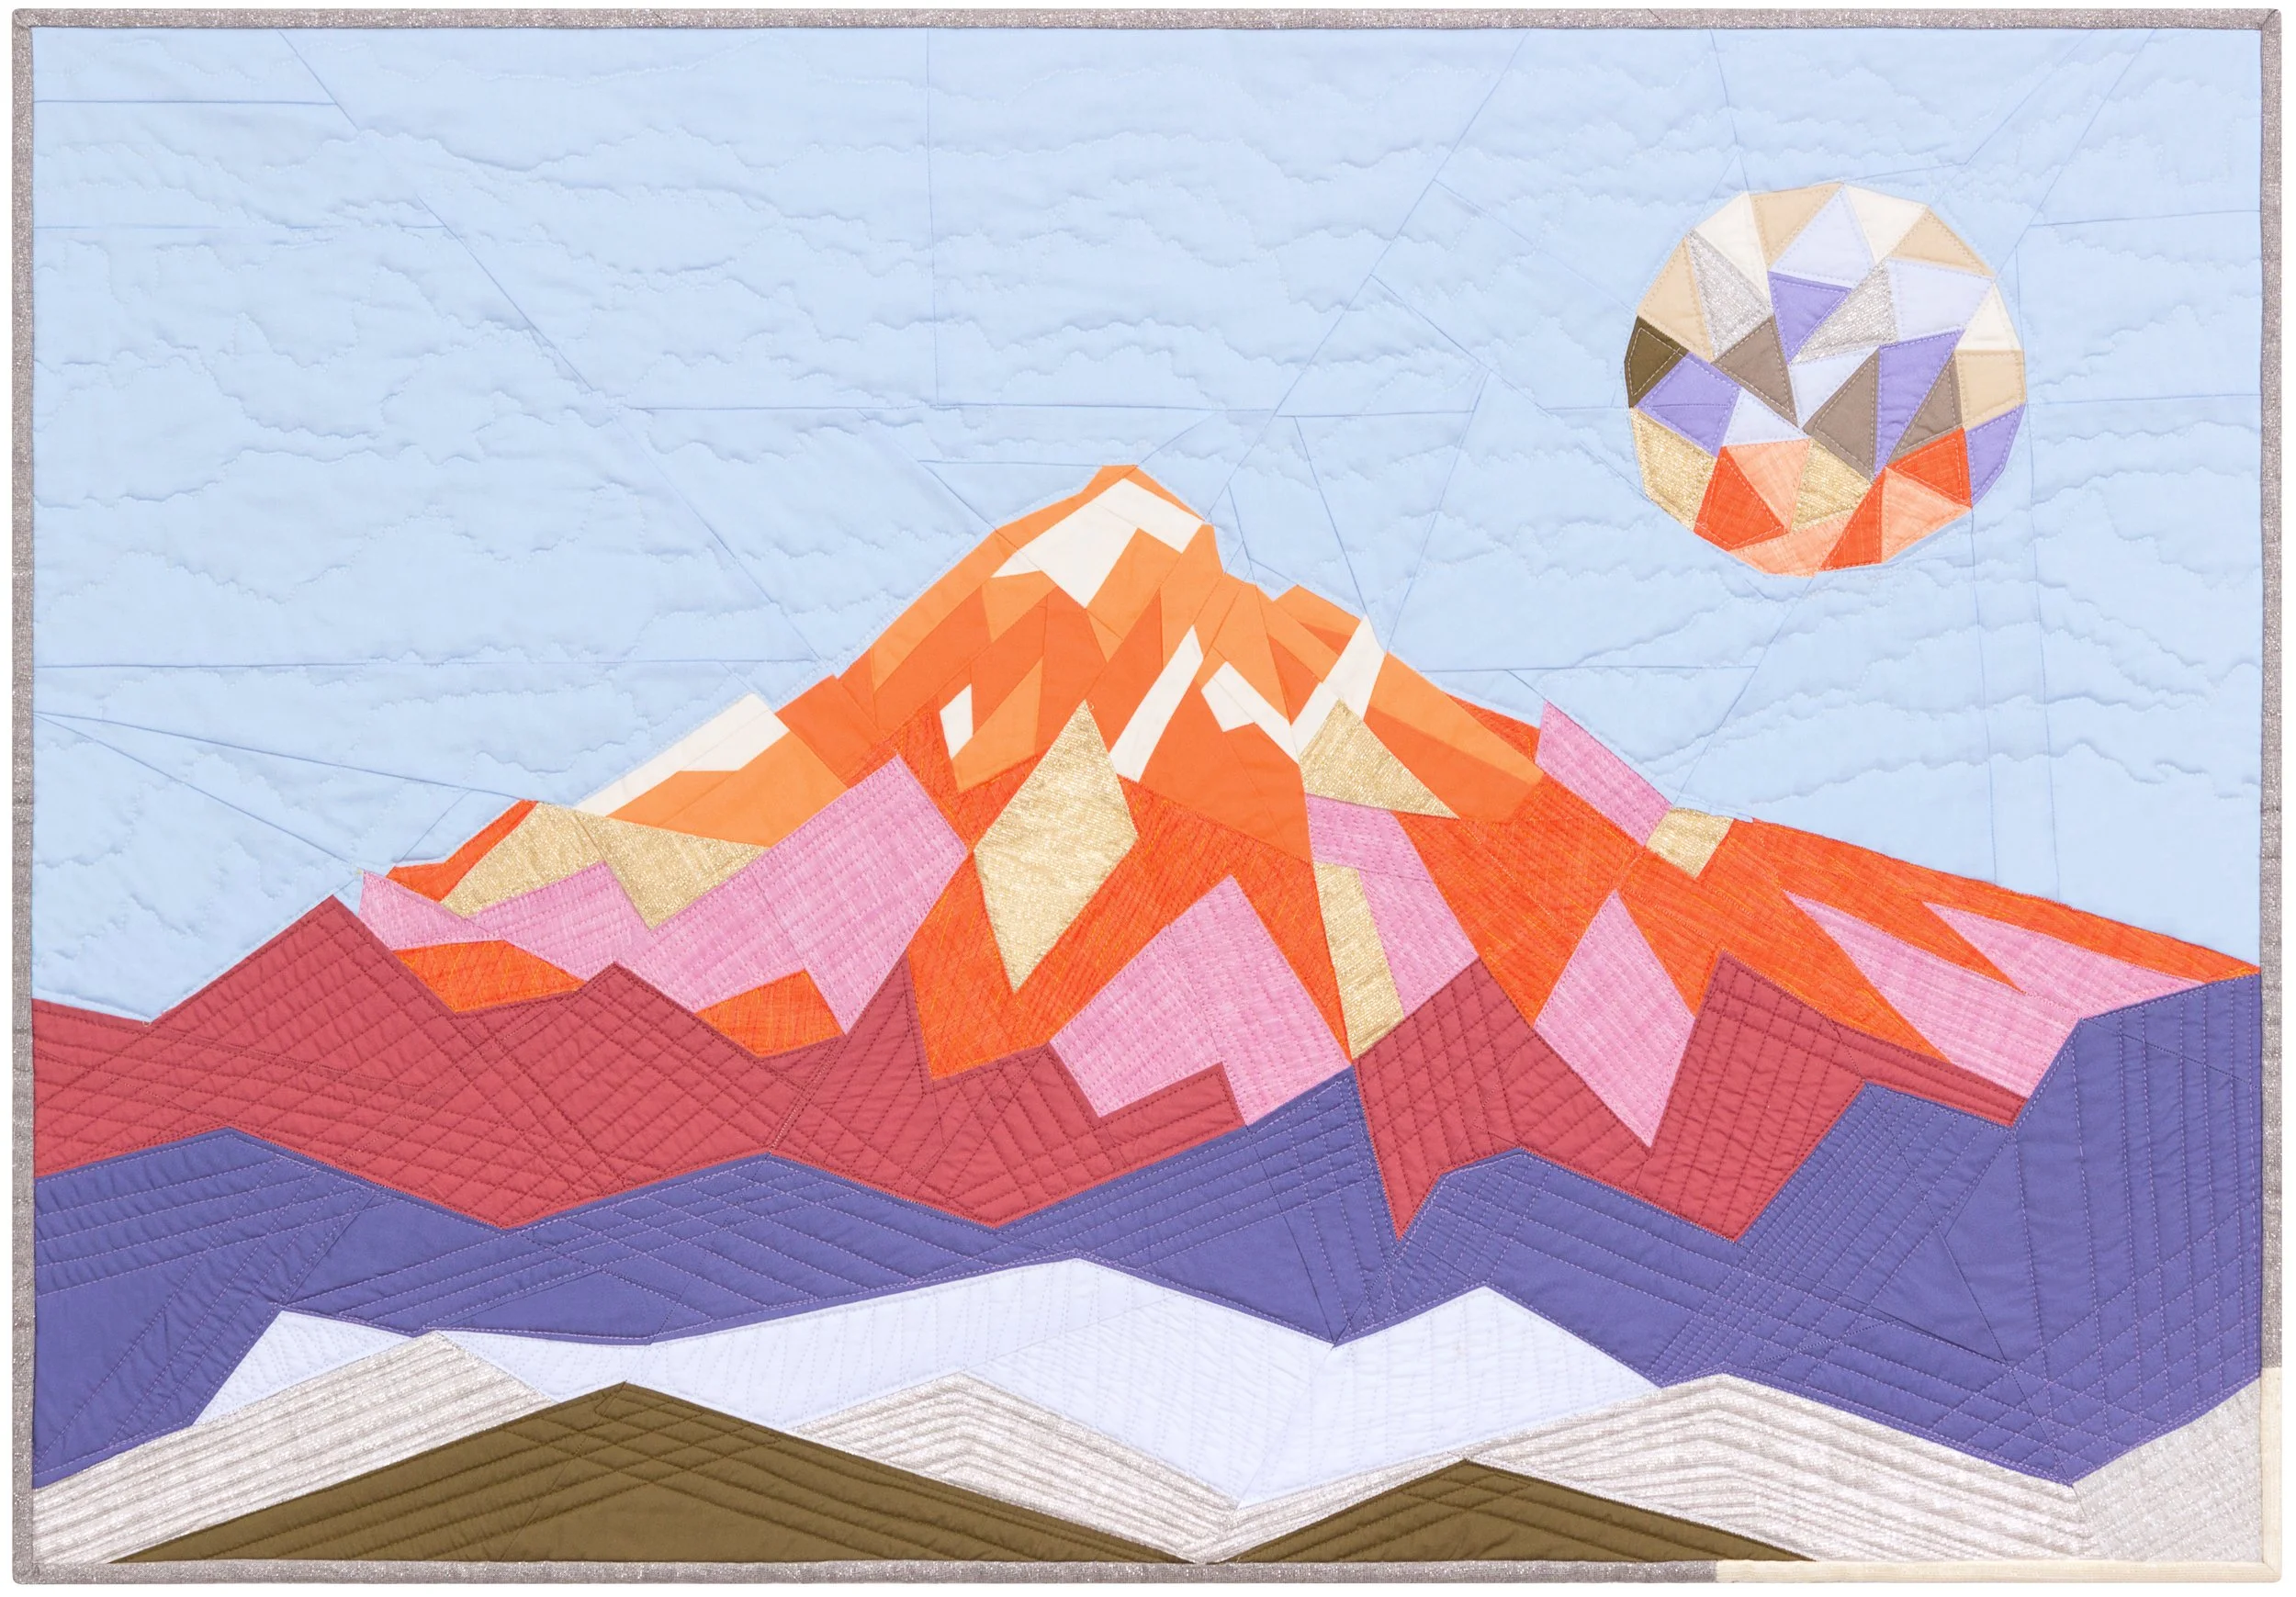
Foundation Paper Piecing is used to achieve precision points and designs not easily achieved through traditional piecing techniques. Well crafted Foundation Paper Piecing patterns provide a structured experience to create exacting replications of complex original quilts. By deconstructing the existing pattern “Elevated Abstractions:Mt. Hood” we will create unique works using the pattern as a beginning and finishing guide.
Foundation Paper Piecing Skills and Design
Starting with the fundamental foundations (every pun intended) we will delve into all aspects of FPP from tools to paper to thread. With over twenty years of expericnce I have tried every trick, every paper, every thread and I have strong opinions. My strongest opinion is no one else’s opinion matters for you but your own and I love helping you find your own opinions! I will show you the process I used to create my original patterns and take us to deeper levels of understanding foundation paper piecing pattern development.
Meet Your Mountain
Who is your mountain? Who are you, visiting your mountain? Thus far I have met every animal in my work. Most of the animals I have spent a little time with and with each, there was an essence, a personality, a feeling I was trying to achieve through their likeness in my work. I have also met the mountains and creating their essence was just as important for me. So, who is your mountain? Your answers begin to provide the information to construct a time of day, a color palette and scenic print choices. Are there animals on your mountain? What color are the trees? Is it snowy on top? All over? Collect a variety of fabrics and prints to explore.
Deconstructing FPP
With a solid knowledge of how the original pattern was designed and constructed, each student will explore their own ideas in altering and deconstructing the pattern. From simply changing color and shade to completely altering shape and layout, the options to deconstruct and reconstruct are endless. We will methodically work through the process each at your own comfort level and pace. Some will opt for quilts that look very similar to the original while others will take the deconstruction process further.
Supply List
All of my favorite supplies are linked in the list.
Workshop kit: The $40 kit fee for this class includes the original Elevated Abstractions: Mt. Hood pattern, a copied set of starting templates, overlay paper, dry erase marker, and tracing paper. Pay ahead of time by purchasing HERE.
Drawing tools - a pencil, eraser, colored pencils or markers, straight edge
Tape - lightweight clear tape for paper
Rotary Cutter - I use a 45 mm rotary cutter. Should be larger than 20mm.
Personal Cutting Mat - I use a 14” spinning mat. You will need at least a 12” square mat.
Quilting Ruler - I use 12” Add-A-Quarter Plus ruler. At least 12“ ruler with 1/4” lines will work. You may also want a longer quilting ruler.
Seam Ripper - This is a necessary part of foundation paper piecing. Trust me :)
Thread - I prefer Wonderfil Decobob 80 wt thread in top and bobbin
Seam Roller - I use my Violet Craft seam roller and no iron. This is optional.
Sewing Machine - An open toe foot is nice. Standard foot is fine.
Fabric - Fabric requirements for the original Mt. Hood quilt are HERE for reference and size guidance. Consider your own aesthetic and the questions posed about your mountain. What time of year is it? What colors do you see on your mountain? Are there animals, flowers or other things there? How are your trees? Is there water? Snow? Bare earth? How is your sky? Is the moon out or the sun? Are there stars or birds or other? Bring a selection of fabrics that answer those questions. Students are encouraged to share and partake in the stash I will bring with me.